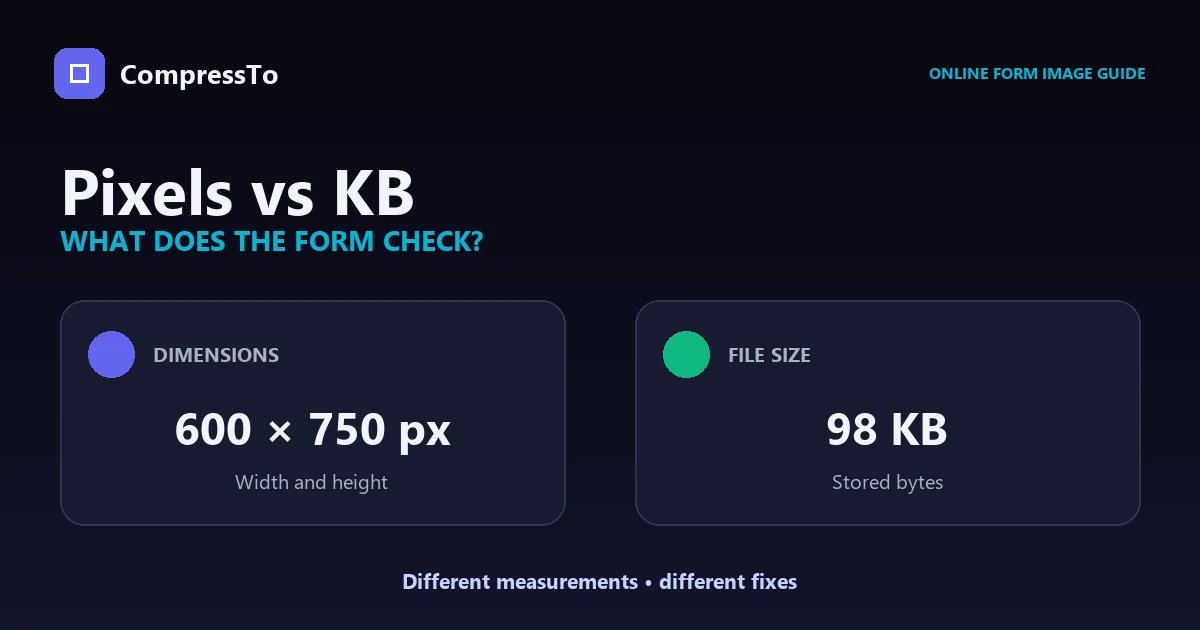
You have compressed a photograph below 100KB, but the form still rejects it. Or the file has the required dimensions, yet the portal says it is too large. The reason is simple: image dimensions and file size are different measurements, and many online forms check more than one rule.
- Dimensions describe the width and height of an image in pixels, such as 600 × 750 px.
- File size describes how much storage the file uses, such as 82KB or 1.4MB.
- Aspect ratio describes the shape of the image, such as 4:5 or 3:4.
- Format identifies the file type, such as JPG, PNG or WebP.
- Visible-content rules determine whether a face, signature, background or document is clear and correctly framed.
An image can pass one requirement and fail another. The safest approach is to read every upload instruction, identify the failed rule, and make only the change that is needed.
Image dimensions and file size are not the same
| Requirement | What it measures | Example | Usually fixed by |
|---|---|---|---|
| File size | Stored data | 50KB–200KB | Compression |
| Pixel dimensions | Width and height | 600 × 750 px | Resizing |
| Aspect ratio | Image shape | 4:5 | Cropping |
| File format | Encoding or container | JPG or JPEG | Format conversion |
| Visual content | What the image shows | Clear face or full signature | Retaking or careful cropping |
| DPI/PPI metadata | Intended print density | 300 dpi | Usually irrelevant unless explicitly required |
The word “size” creates much of the confusion. Image size may refer to dimensions, file size, print size or even the physical size of a passport photograph. Always look for the unit:
- px means pixels or dimensions.
- KB/MB means file size.
- cm/inches means physical or print dimensions.
- DPI/PPI refers to print or sampling density, not the number of pixels by itself.
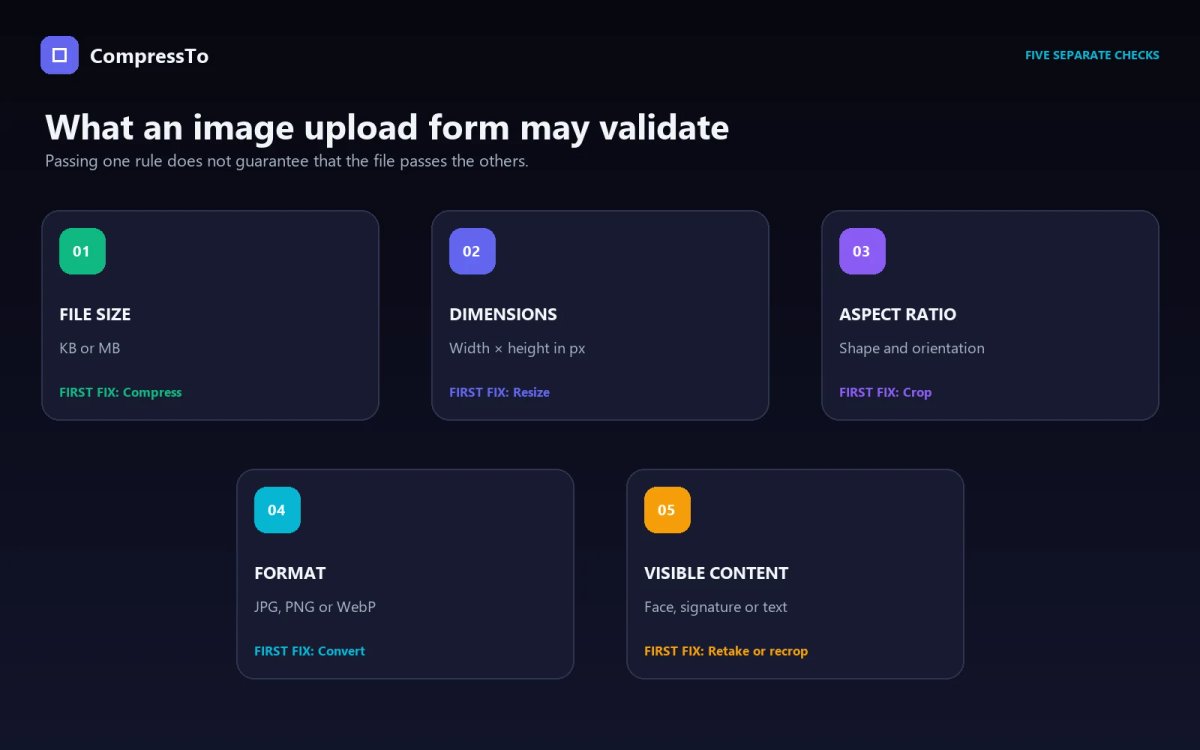
What can an online form actually check?
1. File size in KB or MB
A form may reject a file that is above its maximum or below its minimum. For example, a rule might require a photograph between 20KB and 200KB.
A minimum matters too. Compressing a 60KB image to 15KB would fail a 20KB–200KB rule even though the image became smaller.
2. Pixel dimensions
A portal can read the image header and determine its exact width and height. A 1200 × 1500 px image does not become 600 × 750 px merely because its file size falls below 100KB.
Requirements may be exact, such as 630 × 810 px; minimum, such as at least 600 × 750 px; maximum, such as no more than 2000 × 2000 px; or a permitted range. These rules are not interchangeable. “At least 600 px wide” does not mean “exactly 600 px wide.”
3. Aspect ratio and orientation
The aspect ratio is the relationship between width and height. Both 600 × 750 and 1200 × 1500 have a 4:5 ratio, even though their dimensions and file sizes can be very different.
A portrait field may reject or badly crop a landscape photograph. If the required shape differs from the source image, compressing it will not solve the problem; it must be cropped or resized appropriately.
4. Accepted format
A file can meet the KB and pixel requirements but still fail because the portal accepts only JPG/JPEG. Renaming photo.webp to photo.jpg does not convert it—the image must be encoded in the accepted format. Our JPG vs PNG vs WebP real file-size test found that the smallest format depended on the image type. The smallest format is not useful if the destination portal does not accept it. Follow the portal’s format rule first.
5. Visual and document rules
Automated file validation is only the first stage. An application may upload successfully and still be rejected later if:
- The face or signature is blurry.
- The face is too small or incorrectly positioned.
- The background is not permitted.
- Part of the document or signature has been cropped away.
- The image is stretched or distorted.
- The photograph has been altered in a way the application forbids.
The goal is not merely to make the upload button accept a file. The submitted image must remain suitable for verification.
Real requirements show why every unit matters
Official instructions do not all use the same combination of rules. At the time this article was prepared:
- The UK government’s digital passport-photo guidance required a photo to be at least 600 pixels wide and 750 pixels tall, between 50KB and 10MB, and clear, in colour and unaltered.
- Passport Seva’s ICAO-compliant photograph guidance in India specified a colour image with dimensions of 630 × 810 pixels, along with composition and background requirements.
- An NTA notice for a 2025 application required a passport-size photograph between 10KB and 300KB in JPG/JPEG format.
These examples are not universal templates. They demonstrate that a portal may specify both pixels and KB, require exact dimensions, or focus mainly on file size and format. Requirements can change between organisations and application cycles. Always follow the current instructions shown by the exact form you are completing.
A controlled test: the same image can have very different KB sizes
We created one deterministic 1200 × 1500 px test image and exported it using different JPEG settings. We then resized the same source to 600 × 750 px. File sizes were measured consistently as bytes divided by 1,024 and are displayed as KB.
| Version | Dimensions | JPEG quality | Exact bytes | Displayed size |
|---|---|---|---|---|
| High-quality export | 1200 × 1500 px | 90 | 477,685 | 466.5KB |
| More-compressed export | 1200 × 1500 px | 65 | 175,673 | 171.6KB |
| Resized export | 600 × 750 px | 90 | 82,752 | 80.8KB |
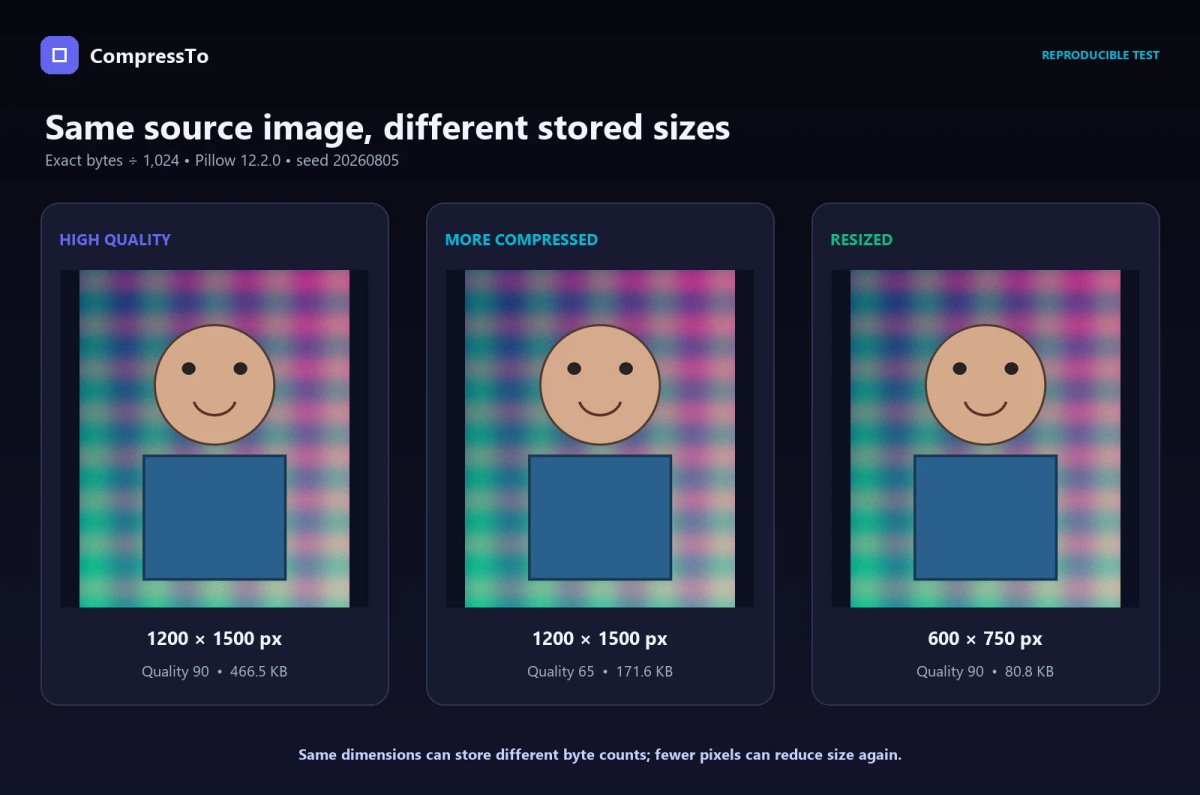
This small test proves two different points:
- The dimensions can remain exactly the same while the file size changes. Both 1200 × 1500 versions contain the same number of pixels, but the more-compressed version is much smaller.
- Reducing dimensions can also reduce file size. The 600 × 750 version contains one-quarter as many pixels as 1200 × 1500 and was much smaller even at the higher JPEG quality setting.
These numbers are a controlled demonstration, not a promise for every photograph. File size also depends on image detail, noise, format, encoder and metadata. Two photographs with identical dimensions and quality settings can still have different file sizes.
Does changing DPI reduce file size or fix an online upload?
Usually, no. DPI (dots per inch) is primarily a printing concept; PPI (pixels per inch) describes pixel density. Most online forms care about the actual pixel grid and stored bytes, not how densely those pixels might be printed. The U.S. National Archives explanation of DPI and PPI provides useful background on the distinction.
In our controlled test, the same 1200 × 1500 JPEG was saved once with 72 dpi metadata and once with 300 dpi metadata. Both files were exactly 370,298 bytes (361.6KB) and retained the same pixel dimensions. Their checksums differed because the metadata differed, but changing the DPI value did not reduce the stored image data.
If a portal explicitly asks for a DPI value, follow that rule. Otherwise, changing 72 dpi to 300 dpi—or the reverse—is unlikely to fix a pixel-dimension or KB error.
How to interpret common upload errors
| Error message or instruction | Likely problem | Correct first action |
|---|---|---|
| File must be below 100KB | File size | Compress to slightly below 100KB |
| Image must be 600 × 750 px | Pixel dimensions | Resize or crop to 600 × 750 px |
| Minimum width is 600 pixels | Image too narrow | Use a higher-resolution source; avoid upscaling a tiny blurry image |
| Invalid file type | Format or extension | Convert to the accepted format |
| Portrait image required | Orientation or aspect ratio | Crop to the required portrait shape |
| Image is too small | Ambiguous: KB or pixels | Re-read the rule and look for KB/MB or px |
| Upload failed | Could be file, connection, filename or portal issue | Check every stated rule, simplify the filename, then retry |
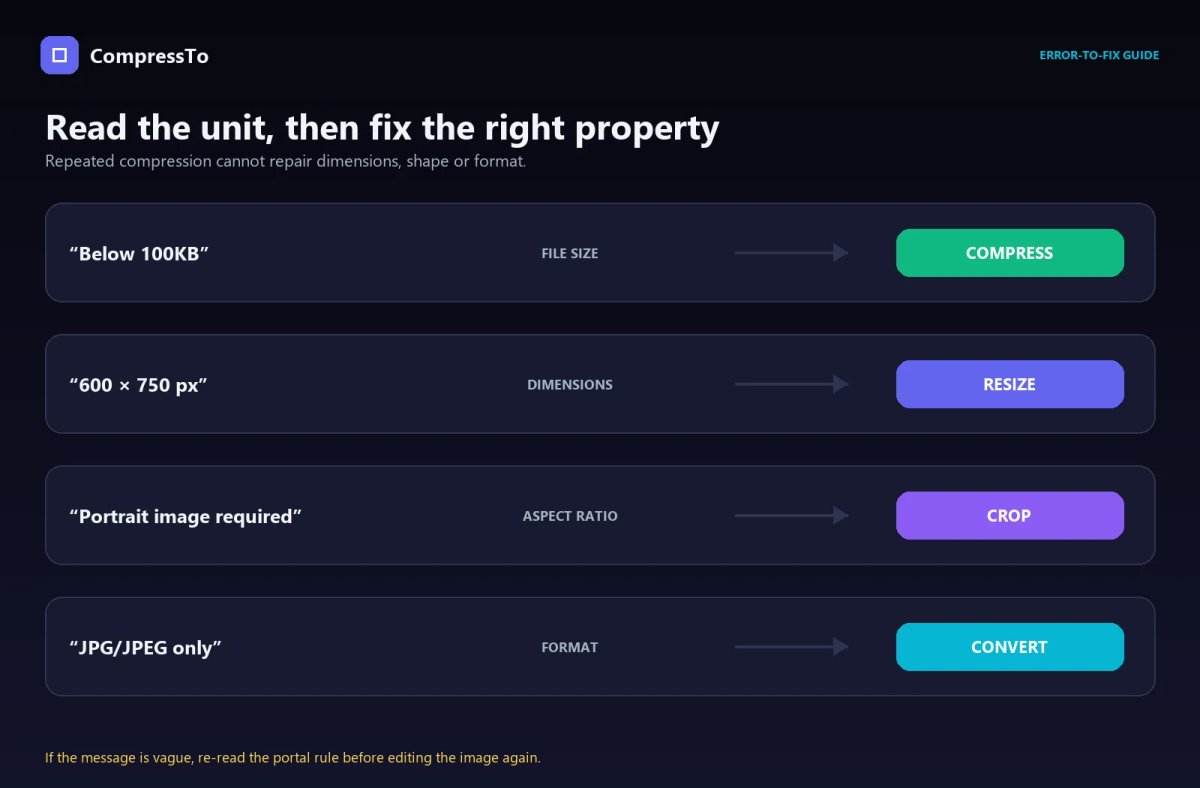
Portal messages are not always well written. If the message is vague, do not repeatedly compress the image. Excess compression can damage clarity while leaving the actual problem unresolved.
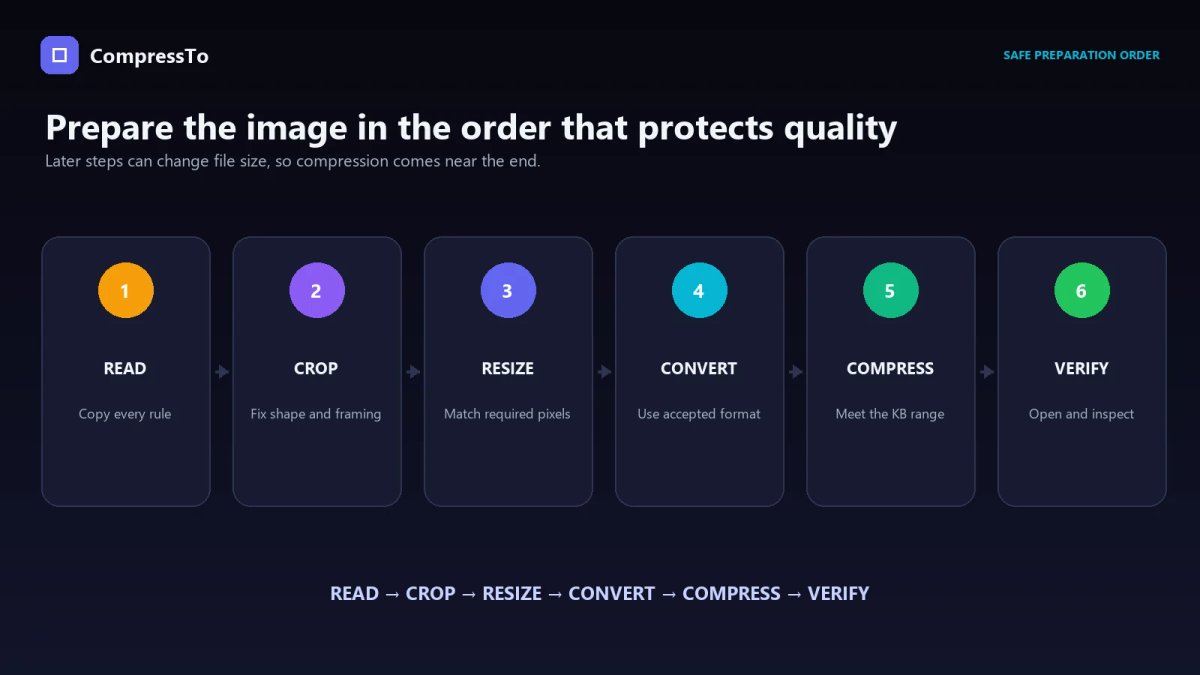
The safest order for preparing an image for an online form
Step 1: Copy every requirement
Before editing, write down the minimum and maximum file size, required pixel dimensions or range, aspect ratio or orientation, accepted formats, and all background, face, signature or document rules. Do not rely on general passport-photo advice when the application provides its own specification.
Step 2: Start with the clearest original
Use the original camera file or scan where possible. Avoid editing an image that has already been repeatedly compressed, forwarded through messaging apps or captured as a screenshot.
Step 3: Crop to the required shape
Crop first when the form specifies an aspect ratio, orientation or exact framing. Keep the face, signature or complete document inside the permitted area. Never stretch the image to force it into a new shape.
Step 4: Resize to the required pixels
If exact or maximum dimensions are given, resize the cropped image accordingly. If only minimum dimensions are specified and your image already exceeds them, resizing may not be necessary unless the file is extremely large.
Step 5: Convert to an accepted format
Use JPG/JPEG if that is the specified format. A real conversion changes the encoding; changing only the filename extension does not.
Step 6: Compress to the required KB range
Once the pixels, shape and format are correct, reduce the file size. Leave a small safety margin below the maximum—for a 100KB ceiling, a result around 95–99KB is safer than a file reported as exactly 100.0KB because different systems may round units differently.
If your dimensions and format are already correct, use CompressTo’s browser-based image compressor or the dedicated compress image to 100KB tool. CompressTo changes file size; it should not be treated as a substitute for resizing or cropping when a portal requires specific pixels. For more detail, see the guide to compressing an image to 100KB for online forms.
Step 7: Verify the downloaded file
Before uploading, confirm the exact file size, width and height in pixels, format, clarity, orientation, and that nothing important was cropped or distorted. Open the final file at 100% zoom. A technically valid but unreadable image is not a successful result.
When should you compress, resize, crop or convert?
| Your problem | Compress | Resize | Crop | Convert format |
|---|---|---|---|---|
| Above the maximum KB/MB | Yes | Sometimes | No | Sometimes |
| Wrong pixel dimensions | Afterward, if needed | Yes | Sometimes | No |
| Wrong aspect ratio | Afterward, if needed | Sometimes | Yes | No |
| Unsupported format | Afterward, if needed | No | No | Yes |
| Blurry face or signature | No | Usually no | No | No—return to a clearer source |
Reducing dimensions is useful when a camera image contains far more pixels than the form needs. Compression alone is preferable when the dimensions are already correct and sufficient detail must be preserved.
Why two images with the same dimensions can have different file sizes
Pixel count influences file size, but it does not determine it by itself. Other factors include:
- Image content: Fine hair, foliage, fabric, noise and text edges are harder to compress than flat colour.
- Format: JPG, PNG and WebP encode image data differently.
- Quality setting: Stronger lossy compression removes more detail and normally creates a smaller file.
- Colour and transparency: Extra channels and complex colour information may require more data.
- Metadata: Camera, location, thumbnail and editing information can add bytes.
- Encoder: Different software can produce different sizes at apparently similar quality settings.
There is no reliable formula such as “600 × 750 pixels always equals 100KB.” Dimensions tell you the number of pixels, not how efficiently their content will be stored.
How to protect faces, signatures and document text
- Begin with the original image, not a messaging-app copy.
- Crop unnecessary background before lowering quality heavily.
- Use the portal’s required dimensions rather than shrinking blindly.
- Keep signatures dark, complete and separated from the paper background.
- Check eyes, facial edges, document numbers and fine text at full size.
- If the result is visibly damaged, return to the previous step and use a slightly larger file or cleaner source.
For exact-size compression, use a target a little below the stated maximum and compare the final image with the original. The exact-size compression guide explains why some targets require a quality trade-off. For measured examples across several ceilings and subject types, see the 500KB vs 200KB vs 100KB vs 50KB quality test.
Final checklist before uploading
- I followed the current instructions on the actual form.
- My file is within both the minimum and maximum KB/MB limits.
- My width and height satisfy the pixel rule.
- My aspect ratio and orientation are correct.
- My file is genuinely encoded in an accepted format.
- The face, signature or document remains complete and clear.
- The filename is simple and contains no unusual characters.
- I opened and inspected the final downloaded file.
Conclusion
An online form does not see image size as one single property. It may separately check bytes, pixels, shape and format, while a human reviewer may later assess clarity and composition.
Read the rule → crop → resize → convert → compress → verify.
When the dimensions and format are already correct, compression can bring the file within the required KB limit. When the pixels or shape are wrong, fix those first. This prevents unnecessary quality loss and gives the final image the best chance of being accepted.
Choose a KB target, process the image locally in your browser, and inspect the downloaded result before submitting it.
Sources and test disclosure
- UK Government: Get a passport photo—digital photos
- Passport Seva: Guidelines for ICAO-compliant passport photographs
- National Testing Agency notice dated January 16, 2025
- U.S. National Archives: DPI and PPI explained
Requirements were checked on August 5, 2026 and are examples, not universal templates. The reproducible package uses Pillow 12.2.0, NumPy 2.3.5, random seed 20260805, optimized JPEG exports with 4:2:0 subsampling, and Lanczos resizing. Every exact byte count and SHA-256 checksum is recorded in the local evidence manifest. No file was padded and no private or real application image was used.