
You have an image that looks perfectly clear, but the website says it is too large.
Perhaps an application form accepts images only below 100KB. Maybe you need to email a photograph, upload a profile picture, or reduce an image so a website loads faster.
The obvious solution is compression. The difficult part is reaching the required size without making the image blurry, blocky, or difficult to read.
The honest answer is that compression always involves a balance. You can often reduce an image dramatically without noticing much difference at normal viewing size. However, very small targets may require lower image quality, smaller pixel dimensions, or both.
This guide explains how to find that balance. It also shares the results of a real CompressTo experiment using a detailed photograph and a text-heavy infographic.
Quick answer
To compress an image to a specific KB limit without unnecessary blur:
1. Start with the largest file size the destination allows.
2. Keep the original dimensions only when they are important.
3. Review the result at normal size and at 100% zoom.
4. Check faces, text, thin lines, edges, and dark areas carefully.
5. Try a larger target when the image looks visibly degraded.
6. Always recompress from the original file rather than from an already compressed copy.
In our tests, 200KB gave the best overall balance for both a detailed photograph and a text-heavy graphic. A 100KB target remained useful in many situations, while 50KB caused much more visible quality loss.
What does “compress to an exact file size” mean?
When a form asks for an image below 100KB, it usually means that 100KB is the maximum accepted size.
The final image does not normally need to be exactly 100.0KB. An output of 95KB or 91KB should usually satisfy a “maximum 100KB” requirement.
A compression tool therefore aims to create the clearest possible image that remains at or below the selected target.
This is different from simply moving a quality slider. Two images compressed using the same quality setting may produce very different file sizes because their colors, dimensions, textures, and level of detail are different.
File size and image dimensions are not the same
These two measurements are often confused:
- File size is measured in KB or MB.
- Dimensions describe the width and height in pixels, such as 1448 × 1086.
A larger image contains more pixels, and those pixels require more information to store. Reducing dimensions can therefore reduce file size significantly.
Compression can also reduce file size without changing dimensions by storing the image data more efficiently or by removing some visual information.
For example, an image may remain 1448 × 1086 pixels while its file size falls from more than 2MB to around 200KB. But when the target becomes very small, reducing quality alone may not be enough. The tool may also need permission to reduce the dimensions.
CompressTo includes a Preserve dimensions option:
- Turn it on when the original pixel dimensions are important.
- Leave it off when meeting the smallest possible file-size limit is more important.
What happens during image compression?
Lossless compression
Lossless compression reduces file size without discarding the original image information.
PNG commonly uses lossless compression, which makes it useful for screenshots, graphics, transparency, sharp edges, and text. However, PNG photographs can remain relatively large.
Lossy compression
Lossy compression removes some image information to create a smaller file.
JPEG is a widely used lossy format, especially for photographs. Lower quality settings generally create smaller files, but they can gradually introduce softness, blockiness, color changes, or artifacts around sharp edges.
WebP supports both lossy and lossless compression. It can often produce smaller web images than comparable JPEG or PNG files, although the best format still depends on the image and its intended use.
Modern browser-based tools can process images directly in browser memory and create compressed outputs without requiring the file to be sent to a remote server.
How to compress an image using CompressTo
1. Open CompressTo.
2. Upload or drop your image into the tool.
3. Select the required target, such as 50KB, 100KB, or 200KB.
4. Decide whether to preserve the original dimensions.
5. Start the compression.
6. Review the output size, reduction percentage, dimensions, and before-and-after comparison.
7. Download the image when the result looks suitable.
When the first target produces noticeable quality loss, you do not need to upload the image again. Use the result-screen controls to try another target such as 200KB or 500KB.
CompressTo recompresses from the original image stored temporarily in your browser, not from the previously compressed output. This avoids an additional generation of quality loss.
Choose your required target size, compare the result, and download the clearest version that meets your file-size limit.
Real CompressTo comparison test
We tested two different images:
- A detailed living-room photograph
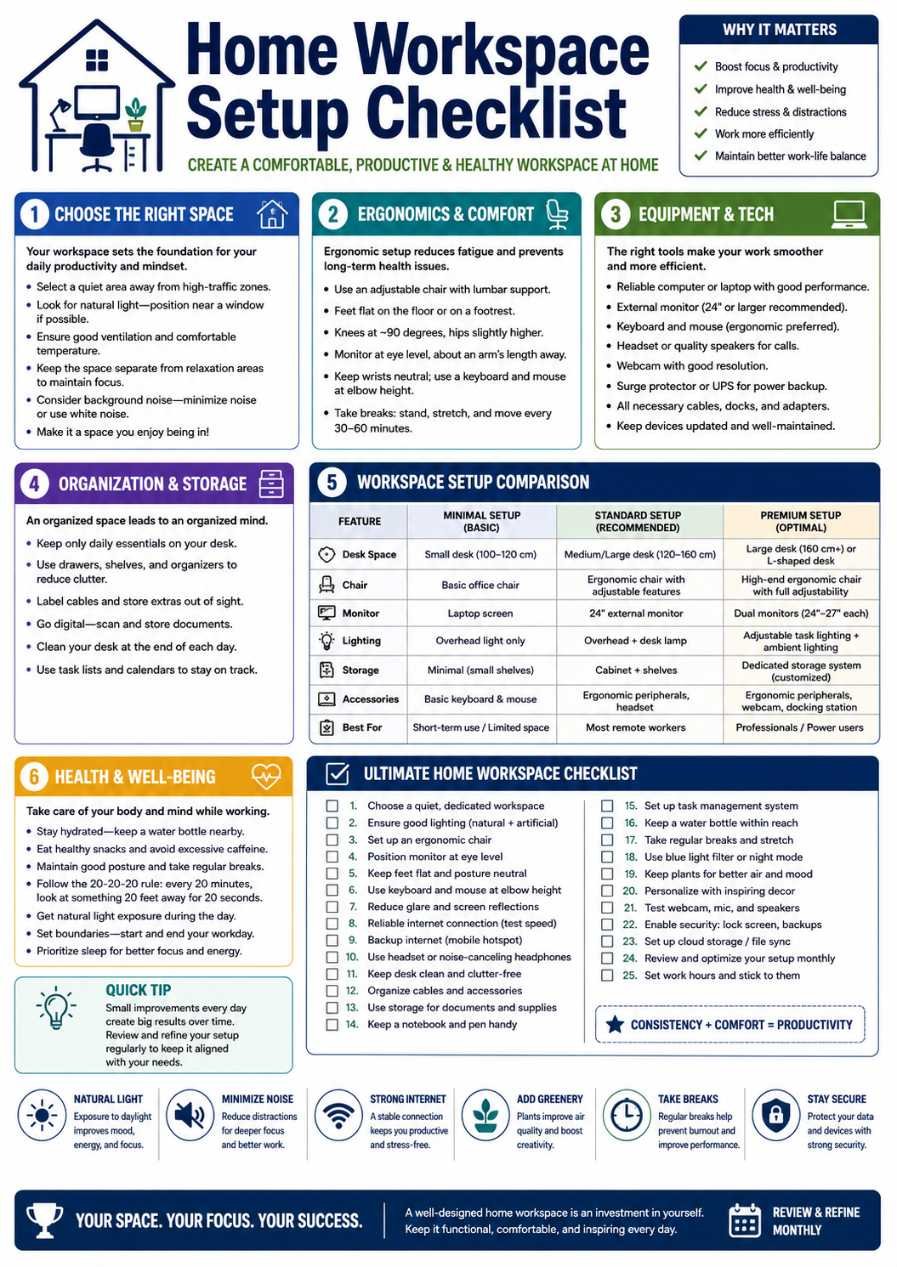
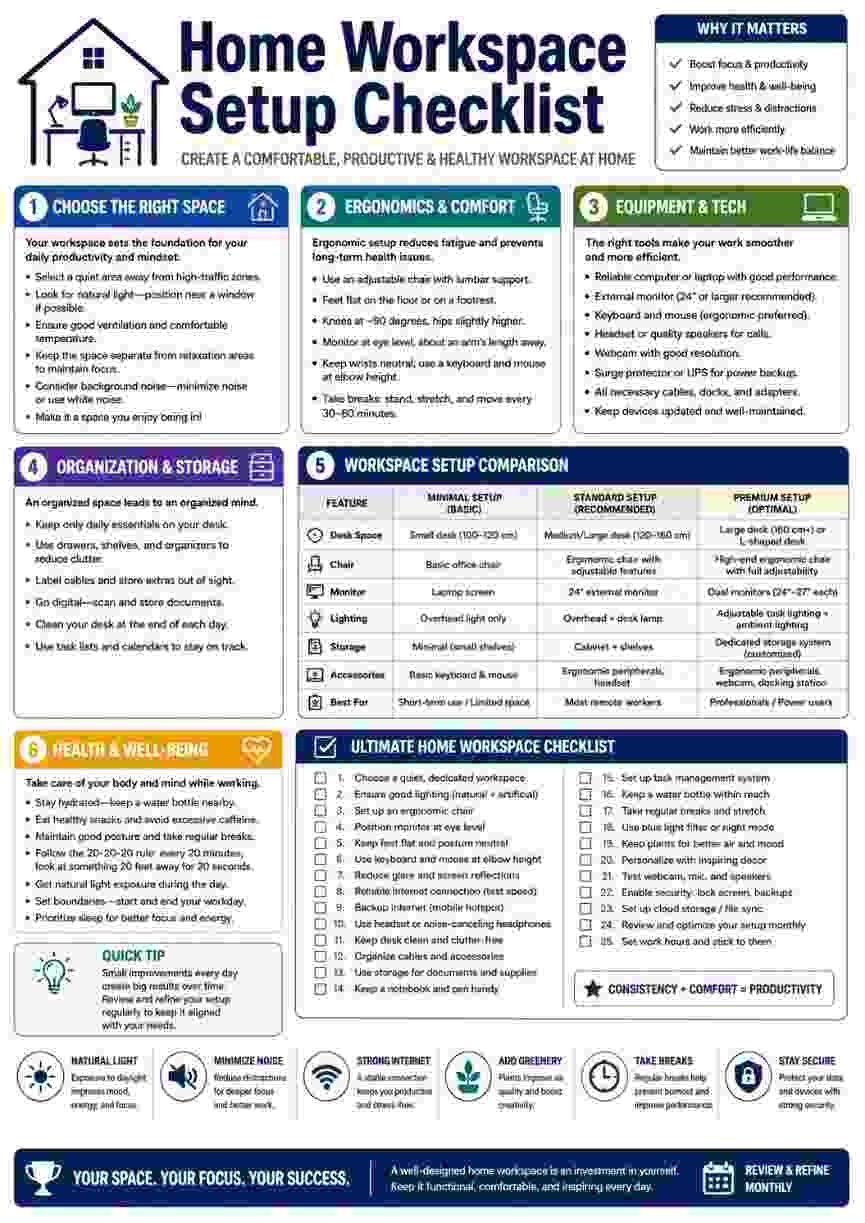
- A text-heavy home-workspace infographic
Both originals were PNG files. The compressed outputs were JPG files, and Preserve dimensions was turned off. CompressTo was therefore allowed to reduce dimensions when needed.
These results come from two specific sample images. Other images may behave differently depending on their dimensions, format, colors, textures, and amount of detail.
Photograph compression results
The original photograph had:
- File size: 2.21MB
- Dimensions: 1448 × 1086
- Format: PNG
| Target | Actual output | Final dimensions | Reduction | Visual result |
|---|---|---|---|---|
| 200KB | 192.3KB | 1448 × 1086 | 91.5% | Very close to the original at normal viewing size |
| 100KB | 95.2KB | 1231 × 923 | 95.8% | Clear at normal size, with softer fine details |
| 50KB | 42.9KB | 1448 × 1086 | 98.1% | Noticeable softness and compression artifacts |
The 200KB version offered the strongest balance. Books, plants, fabrics, shadows, and rug textures remained visually convincing while the file became more than 90% smaller.
At 100KB, the room still looked good during ordinary viewing. At 100% zoom, fine textures became softer. CompressTo also reduced the pixel dimensions to help reach the target.
The 50KB version remained recognizable, but it was too aggressively compressed for a polished article or professional presentation. Blockiness and lost detail were visible around the curtains, bookshelf, rug, and darker areas.


Text-heavy graphic results
The original infographic had:
- File size: 1.82MB
- Dimensions: 1055 × 1491
- Format: PNG
| Target | Actual output | Final dimensions | Reduction | Visual result |
|---|---|---|---|---|
| 200KB | 176.9KB | 897 × 1267 | 90.5% | Most text remained clear and comfortable to read |
| 100KB | 91.1KB | 1055 × 1491 | 95.1% | Usable, but small text and thin lines were visibly softer |
| 50KB | 46.6KB | 865 × 1223 | 97.5% | Small text became blurry and unreliable |
The 200KB output remained suitable for an article, presentation, or online reference. Main headings, icons, colors, and most body text stayed readable.
At 100KB, the graphic remained usable, but the smallest text, table borders, and thin lines showed visible JPEG softness. CompressTo warned that the result had noticeable quality loss and suggested trying a larger target.
At 50KB, the title and large headings remained visible, but several smaller sections became uncomfortable to read. It may work as a small preview, but not when readers need to understand every line.
What did the test teach us?
Photographs tolerate compression better than small text
Photographs contain natural textures, shadows, and color variations. Minor detail loss can be difficult to notice at ordinary viewing sizes.
Text-heavy graphics behave differently. Letters, icons, table borders, and thin lines depend on sharp edges. JPEG compression can create blur or artifacts around those edges much sooner.
This is why the same 100KB target may look acceptable for a photograph but visibly weaker for an infographic.
A larger target can produce a much better result
he difference between 100KB and 200KB may appear small, but those extra kilobytes can preserve substantially more useful detail.
When an upload form accepts files up to 200KB, do not automatically force the image down to 50KB. Use the largest sensible size within the permitted limit.
Dimension reduction can protect visible quality
When dimensions are allowed to change, the encoder has fewer pixels to store. This may help it reach the target without lowering visual quality as aggressively.
This can be useful for application forms and mobile uploads, where the image will not be displayed at full resolution.
Keep dimensions preserved when:
- Exact pixel dimensions are required
- The image will be printed
- Users need to zoom into fine details
- The image contains important small text
- A client or platform has specified the required width and height
How to avoid making the image blurry
Start with a realistic target
Do not immediately choose the smallest option. Begin with the maximum file size permitted by the destination.
When the limit is 200KB, try 200KB first, not 50KB.
Inspect the most sensitive areas
For photographs, check:
- Faces and hair
- Leaves and grass
- Fabric textures
- Dark shadows
- Fine patterns
- Smooth gradients
For graphics, check:
- Small text
- Thin lines
- Icons
- Table borders
- Color boundaries
- Logos
Always inspect the result at normal size and at 100% zoom.
Use the right format
JPEG usually works well for photographs because it can reduce photographic file sizes significantly.
PNG is often more suitable for graphics, screenshots, transparency, and sharp text when edge clarity is important, although it may create larger files.
WebP may offer a useful balance for websites because it supports both lossy and lossless compression. Our JPG vs PNG vs WebP file-size test compares a photograph, text screenshot and transparent graphic using the same dimensions within each test.
Do not repeatedly compress an already compressed image
Each new lossy compression can discard more information.
When changing the target from 100KB to 200KB, recompress from the original uploaded file. CompressTo’s target-switching controls are designed to do this automatically during the same browser session.
Common mistakes to avoid
Confusing KB with dimensions
A 100KB image does not have a fixed width or height. Two 100KB images can have entirely different dimensions and visual quality. Our image dimensions vs file size guide explains how online forms validate pixels, KB, aspect ratio, format and visible content as separate requirements.
Assuming every image will react the same way
A product photo, detailed landscape, passport photograph, screenshot, and infographic all contain different visual information. The best target must be judged from the actual result.
Believing “no quality loss” literally
When lossy compression is used, some information is normally removed. The realistic goal is no noticeable quality loss for the intended use, not mathematically identical image data.
Compressing far below the required limit
When a website accepts files up to 200KB, a 190KB result may preserve much more useful detail than a 45KB result. Smaller is not always better.